Walkthrough for Dragon's Dogma 2 (DD2) provides a detailed and systematic guide to completing the game's Quests and story Locations. This guide includes information on how to progress the Main Quests and key Side Quests, as well as information on where to find vital Items and Equipment, and how to defeat the various Enemy, Boss, and NPCs encounters in Dragon's Dogma 2.
- For a complete list of all available quests in Dragon's Dogma 2, please check our Quests page.
- For helpful guides on the Vocations or Classes in Dragon's Dogma 2, you can check our Vocations page. Quick tip: Players looking to explore and gather hard to reach items should pick mage for their ability to create ice blocks and levitate as you increase in vocation level. You can swap vocations quite early.
- For guides and tips you should know before playing Dragon's Dogma 2, please visit our New Player Help page.
- To find a graphical representation of the different locations in Dragon's Dogma 2, please check our Interactive Map.
- To find a detailed guide on how to solve the Sphinx Riddles in Dragon's Dogma 2, please visit our Sphinx or A Game of Wits page.
Dragon's Dogma 2 Full Walkthrough Guide
List of Main Quests in Dragon's Dogma 2
DD2 Main Quests Part 1
DD2 Story Quests Part 2
DD2 Story Quests Part 3
Dragon's Dogma 2 Part 1 Walkthrough Story Quests
Click to be redirected to the specific page of the quest.
Gaoled Awakening
- Create your Character.
- Follow the Overseer Fiska.
- Meet Rook and help with the work.
- Investigate the disturbance.
- Acquire your starting Weapon
- Fight the Gorgon
- Escape the Excavation Site - The Hole
Welcome to the Walkthrough Guide for Dragon's Dogma 2! Your journey begins at the Excavation Site - The Hole. You start with creating your character using a preset from the group of prisoners or select the one that is hooded to customize their character's appearance from a blank slate. To learn more about creating your character, you can visit the Character Creation page. Take this time to customize the look of your character, choose your starting Vocation (Fighter, Archer, Mage, or Thief), and name your character.
Follow Fiska and the other workers and along the way, you'll meet another slave who goes by the name of Rook. After speaking to him, head to the rendezvous area where all the other workers and the overseer have gathered and start the next objective, picking up a boulder and delivering it to where Rook is. Shortly after, a tremor happens followed by the sound of screaming people, prompting you to investigate the disturbance. Rush to the marked objective and you'll find that a Gorgon is attacking the site.
During this sequence, your avatar will pick up their starting weapon, depending on the starting Vocation you selected during Character Creation. After the cutscene, you'll now fight against the Gorgon alongside other NPCs. Depending on your vocation, you'll be able to use basic attacks, skills, and combat movements as soon as the battle starts. You will also be prompted with a guide on how to grab and throw objects at targets. When fighting the Gorgon, be sure to move away from its radius when it tries to use its gaze to turn its prey into stone. In our gameplay, we were always at a safe distance as we attacked the Gorgon with a long-range attack of Magick Bolt. You will also learn how to grab onto large enemies where you can cling onto their bodies and press the corresponding button to attack, but be wary of this since it will continuously consume your stamina. Upon its health reaching zero, another cutscene will trigger that shows the Gorgon fleeing from the place of battle.
Your next objective will then be updated to "Flee for your life." As soon as you gain control of your avatar, be ready to follow Rook and run towards the cliff where another cutscene will trigger that shows your character jumping off a cliff and rides on a Griffin to escape. As you fly across the landscape, the Griffin will be shot down by another group where you'll land and awaken at the Ultramarine Waterfall — this quest will formally be completed after the cutscene once your character has regained consciousness.
Tale's Beginning
- Follow Justinn.
- Defeat the Goblins.
- Loot the creatures' bodies and check the ravine.
- Follow Justinn and reach the Borderwatch Outpost.
- Use the Rifstone.
- Explore the Borderwatch Outpost to find loot and treasure.
- Rest at the Borderwatch Lounge.
- Head to the North Gate and make for Melve.
This quest starts at the Ultramarine Waterfall where you land after the Griffin being shot down [See Dragon's Dogma 2 Map]. You also find that Rook has fallen into the Brine and has been swallowed. Shortly after, a group of soldiers arrive at the site and a man named Justinn greets you, and asks for you to accompany him back to an outpost. As you gain control of your character, follow Justinn, and just a few steps along the way, you'll find a chest on the left side that's by a rock platform. Loot the chest to find x1 Salubrious Draught. Continue along the cliffside and Justinn will ask you questions about your escape. You can also find some gatherable items such as the Greenwarish which can easily be found on the ground with its vibrant color.
Keep following Justinn and you'll encounter a group of Goblins near a ravine. Take them out and make sure to loot their bodies once they're taken out, and also check the ravine to find a pile of wood that you can rummage to find loot. Continue past the ravine and you'll find another group of Goblins. Do the same after defeating the creatures and you'll shortly arrive at your location which is the Borderwatch Outpost. A cutscene will then trigger and you'll be greeted by a group of Pawns. This sequence will also introduce you to how to use the Riftstone.
Once you've grasped the mechanics of using Rifstones, you can now explore the small outpost where you can find some traveling merchants, a small shop, and make sure to check the Borderwatch Training Grounds to find a chest around that section. If you're done looking around, head to the Borderwatch Lounge and speak to the attendant Warrick to rest. Usually, resting at inns requires the player to pay, but in this case, your first rest at the Borderwatch Lounge is free. After resting, you'll complete the quest and be rewarded with 200 XP.
In Dragon's Wake
- Make for Melve.
- Head to the North Gate of the Borderwatch Outpost.
- Trigger the Ordeals of a New Recruit side quest from Phill.
- Complete the Ordeals of a New Recruit side quest.
- Accompany Accardo back to the Borderwatch Outpost and Report back to Phill.
- Continue your journey to Melve, southwest of the Borderwatch Outpost.
- Arrive at Martyr's Resting Place. Loot the are to find treasure and a Golden Trove Beetle.
- Proceed to Melve and follow a flashback sequence.
- Awaken at Ulrika's House and meet the watchhead Gregor.
- Unlock the Seat of Sovran main quest after speaking to Gregor.
- Pick up some side quests in Melve:
- Speak to Lennart at the inn.
- Report to Gregor at the main entrance of Melve.
- Agree to accompany him to Vernworth.
- Reach the Northern Vermund Checkpoint
- Use the Forgotten Rifstone and/or Campsite at the Northern Vermund Checkpoint.
- Investigate the Gathering of Beasts location and loot the area.
- Defeat the Cyclops near a blocked ravine.
- Continue your journey to Vernworth.
This quest will automatically unlock after resting at the Borderwatch Lounge [See Dragon's Dogma 2 Map]. Proceed to the north gate of the outpost and you'll automatically pick up your first side quest from the stationed guard named Phill. You'll acquire the Ordeals of a New Recruit quest which tasks the player to find a recruit named Accardo and safely escort him back to the Borderwatch Outpost. This side quest is affected by the passage of time, which means that certain outcomes will happen to the quest once a period of days or time passes. For the Ordeals of a New Recruit, if you take your time, the quest will result in finding Accardo dead. Proceed to the area quickly and you'll find him being attacked by Harpies. Eliminate the creatures as fast as you can and then escort the man back to the outpost and report back to Phill to complete the quest.
Now if you've made further preparations, you are now ready to travel to Melve on foot. The settlement can be found southwest of the Borderwatch Outpost. Make use of the map to see where the highlighted area is to identify where you need to go, and be ready to fight creatures along the way.
Golden Trove Beetle Location - Within the vicinity of Martyr's Resting Place.
Before reaching Melve, you will stop by Martyr's Resting Place. Make sure to search the area and also find the Golden Trove Beetle on a tree. After clearing this small area, cross the nearby wooden bridge where you'll formally arrive at Melve. Head inside and a flashback sequence will trigger that shows your character fighting off the dragon. You'll lose consciousness during the flashback and awaken at Ulrika's House (still in Melve). Shortly after, outside Ulrika's house, you'll be greeted by a watchhead named Gregor who mentions that he has been tasked to find the Arisen. He'll then ask you to speak to Lennart before you travel with him to Vernworth. You'll also unlock the related main quest, entitled Seat of the Sovran.
Before speaking to Lennart at the inn of Melve, you can take the time to roam around and visit the small settlement's shops and pick up side quests here such as "Medicament Predicament" from Flora at Runne's Apothecary and the "Brothers Brave and Timid" quest from Ian. Both are short quests you can easily complete to acquire some XP. If you're done checking Melve, head to the inn and speak to Lennart to progress the quest and learn more about Vocations. After speaking to Lennart, proceed to the main entrance of Melve and tell Gregor you are ready to accompany him to Vernworth.
Simply head to the marked location which is indicated on the map and make sure you are always with Gregor and if you encounter any creatures, that you fight alongside and protect him to avoid his demise. Your first destination will be at the Northern Vermund Checkpoint. Inside, you can find a forgotten rifstone to reactivate and also a Campsite that you can use. When you're ready continue your journey and make sure to investigate the Gathering of Beasts location which is an area you'll pass by.
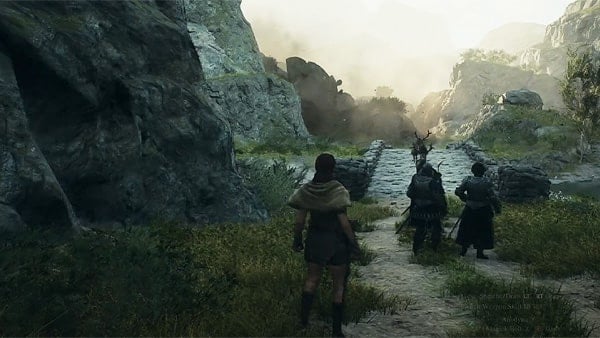
The area is full of goblins, harpies, there are chests there, and nearby there is a blocked ravine that is guarded by a Cyclops. Take this opportunity to clear out the area to gain XP and valuable loot. Once you've cleared the Gathering of Beasts, all that's left is to travel to Vernworth where you'll be taken in by the officials when you arrive. After the cutscene, you'll find yourself in Captain Brant's office who will help you with the task to prove your identity and right as the Arisen.
Dragon's Dogma 2 Part 2 Walkthrough Story Quests
Click to be redirected to the specific page of the quest.
Seat of the Sovran
- Enter Vernworth
- Speak with Captain Brant in the tavern at night.
This quest will automatically unlock after the flashback scene when you arrive at Melve. [See Dragon's Dogma 2 Map] The primary objective of this quest is to reach Vernworth and speak to Captain Brant at The Stardrop Inn in Vernworth. After you've been taken in by the authorities of Vernworth, Captain Brant helps with the process of your discharge. You'll continue in his office where he shares his intentions of helping you and also gives more details as to how you ended up losing your memories.
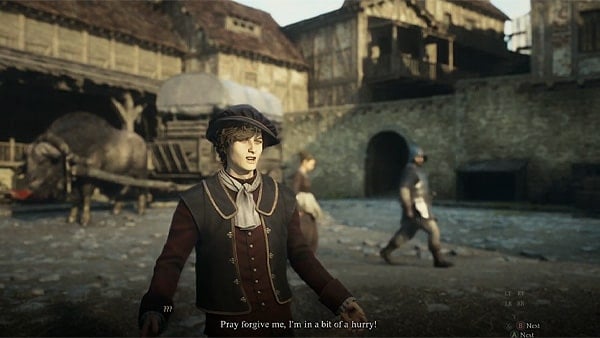
After speaking to him, he'll ask you to meet him at The Stardrop Inn at night. Keep in mind that for the following quests related to the story, you'll receive some quests from him, and you can only speak to him about this at night. Exit his office and a scene will trigger showing a guard chasing a young man (Sven). You have a choice to help him by lying to the guard or tell where he's hiding. But we recommend that you lie so you can unlock other Quests related to Sven. From here, you can roam the city to check shops or pick up Side Quests from NPCs.
When you're done, head to The Stardrop Inn at night to find Brant by the bar. Speak to him and follow him to a private room where you talk more about his plans that will help you claim your right and prove your identity as the Arisen. During your conversation, you will have dialogue options, and answering with "Accept" will unlock the following quests:
- Accept "Tell me of monster culling": Quest unlocked, Monster Culling
- Accept "Tell me of the queen regent.": Quest unlocked, Disa's Plot
- Accept "Tell me of the magistrate.": Quest unlocked, The Caged Magistrate
Choosing to learn about the monster culling, Brant advises you about an order sent to his soldiers to slay monsters across the land and he asks if you could contribute by helping his men. You'll have the option to accept or decline. If you accept, then the questline Monster Culling will become available. About the Queen regent, Brant advises you that you will need to infiltrate the palace to gather evidence of Disa's misdemeanor. And as for the Magistrate, a prisoner beneath the palace, Brant asks for your aid to release the magistrate who can vouch for your identity as the Arisen. You are free to choose which task to accept. Either way, choosing whichever matter you want to prioritize will formally complete this quest. The quest formally becomes complete after choosing one out of the three tasks but you can still accept the others to unlock the questline. By accepting to aid the magistrate, you'll receive the Gaol Key upon unlocking the questline "The Caged Masitrate".
Please take note that you're free to tackle any of the three quests that you get from Brant.
Monster Culling
- Pick up side quest: Vocation Frustration
- Head to Trevo Mine.
- Rescue the Soldiers from the Goblins.
- Find the weapons needed for Vocation Frustration in Trevo Mine.
- Travel to Harve Village.
- Investigate the Bayside Home area of the village.
- Activate the Portcrystal near the Rivage Elder's Home.
- Speak to Dylan to learn about the soldiers who need help.
- Enter the Stormwind Cave.
- Rescue the soldiers from the Saurians.
- Resurrect fallen soldiers (if needed) and escort them back to the cave's entrance.
- Trigger Scaly Invaders side quest in Harve Village.
- Travel to the Eastern Edge of Vermund.
- Find the shipment and soldiers.
- Protect the shipment from the Goblins and Sauraians.
- Report back to Klaus to complete Vocation Frustration.
- Report back to Brant to complete Monster Culling.
The Monster Culling quest can be acquired by accepting Captain Brant's request of culling monsters in three locations where his men were dispatched. When you meet him at the Stardrop Inn in Vernworth during the quest "Seat of the Sovran", choose "Accept" after selecting the dialogue option "Tell me of monster culling" to activate the quest. Before you travel to Trevo Mine, we highly recommend you visit the Vernworth Vocation Guild and speak to Klaus to activate the side quest Vocation Frustration.
It is one of the vital side quests of the game since completing it will unlock 2 Vocations, Warrior and Sorcerer. The Vocation Frustration quest tasks the player to find a Greatsword (Two-Hander) and an Archistaff (Grievous Horns), and bring the weapons back to Klaus in Vernworth. By arriving at Trevo Mine and clearing out the mine of Goblins, you'll advance this quest and Vocation Frustration. When you arrive at Harve Village, make sure to reforge the Riftstone by the Bayside Home. The village has multiple collapsed buildings, so be sure to check each one to find loot on the ground and some chests. Your objective is towards the end of the village's beach near the Rivage Elder's Home. Follow the quest marker and you'll find one of Brant's men. Approach the soldier named Dylan and learn more about the location of the other soldiers. You can also find a Protcrystal near the Rivage Elder's Home.
Before entering the Stormwind Cave, make sure you have enough Wakestone since you'll need this to resurrect any fallen soldiers that you find in the cave. The area will be occupied by Saurian creatures, tread carefully and aid the soldiers back to the entrance once you've found them. As you leave the village, you'll trigger a side quest "Scaly Invaders" where you'll fight more Saurian creatures invading the village. Next, head to the eastern edge of Vermund and proceed to the marked objective where you need to help the soldiers defend the shipment from more goblins and saurians.
After completing all three tasks, you can return to Vernworth to report back to Klaus which completes the Vocation Frustration quest (unlocks the Sorcerer and Warrior vocations), and then report the Monster Culling task to Brant at The Stardrop Inn. Completing the quest yields the following rewards: 3000 XP, 7000 G, and x1 Expeditioner's Cloak.
Disa's Plot
- Go to the rear gate of the castle between the hours of midnight and dawn.
- Follow Sonia to The Guardhouse.
- Grab the Marcher's Set in The Guardhouse.
- Wear the Marcher's Set.
- Proceed to the Main Hall.
- Head up to the second floor.
- Find loot in the Vernworth Castle - Guest Chambers.
- Find loot in the Vernworth Royal Chambers.
- Head to the Vernworth Castle Offices.
- Search for evidence of Disa's misdeeds.
- Pick up the Torn Letter.
- Escape through the window of the office.
- Find loot at the Castle Training Ground.
- Report back to Captain Brant at The Stardrop Inn.
Click on the images to enlarge them.
This quest can be unlocked if you choose "Accept" to the dialogue line "Tell me of the queen regent." when speaking to Brant at The Stardrop Inn of Vernworth during the quest "Seat of the Sovran". To start, head to the rear gate of Vernworth Castle between the hours of midnight and dawn. When you arrive, one of Brant's soldiers will be waiting for you and guide you to the entrance of The Guardhouse [See Dragon's Dogma 2 Map]. Follow the soldier and head inside to find a chest containing x1 Marcher's Helm, x1 Marcher's Armor, and x1 Marcher's Cuisses, including some items you can loot. Wear this set and you can disguise yourself when you explore the castle.
Head inside the next room, then make a left to find x1 Lantern Oil on a table. Go back to where you came in and you'll see a set of stairs in front of the doorway. Near the stairs, you'll find another dressing table that has a small tapestry pinned to the wall. On the dressing table, you can find a note "Writings of a Soldier on Duty". The main location you need to reach is the Vernworth Castle Offices which is on the second floor of the castle.
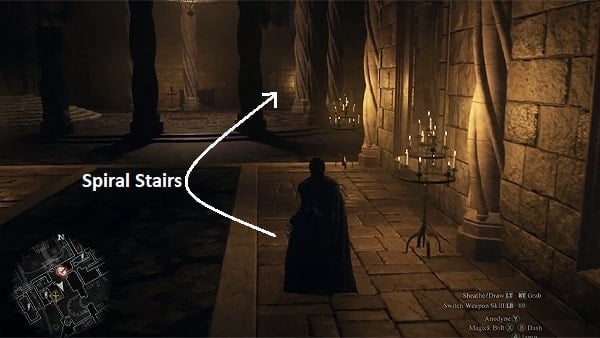
Head to the main hall while avoiding being seen by the guards here, make a right, and go straight. You should find a doorway on the right when you reach the end where you'll find the spiral stairs. Go up and the first room to your left is the Vernworth Castle - Guest Chambers. Go inside this room to find a chest containing x1 Courtly Tunic and x1 Courtly Breeches. You can also find the Vernworth Royal Chambers room that contains a chest with x1 Wakestone and x1 Wakestone Shard. The Vernworth Castle Offices room is the second door on the left after the Guest Chambers. Go inside when you're done checking the floor and investigate the table at the end of the room to find a Torn Letter. Pick it up and a dialogue cutscene with Sven will trigger.
After speaking to Sven, make your escape by climbing out of the window of the office. Carefully slide down the roof and jump back down to the entrance of The Guardhouse. The next objective is to report back to Brant at The Stardrop Inn. But before doing so, you can check the Castle Training Ground, outside the castle, and near The Guardhouse to find a chest that contains x1 Iron Shield. From here you're free to roam but just tread carefully since the area is still considered to be "Restricted".
All that's left is progressing and completing the quest by meeting Brant at The Stardrop Inn. Keep in mind that you can only talk to him at night. Speak to him there and give the Torn Letter to complete the quest. This rewards the player with x1 Wakestone, 6500 G, and 1200 XP.
The Caged Magistrate
- Acquire the Gaol Key from Brant.
- Wear the Marcher's Set as a disguise.
- Proceed to the Vernworth Castle Gaol Tower.
- Meet with Magistrate Waldhar in his cell.
- Speak to Waldhar.
- Find a place with plenty of tomes.
- Acquire the side quest "The Heel of History"
- Head to the slums area of Vernworth.
- Discover The Gracious Hand's Vaults.
- Report back to Waldhar in his cell.
- Lead Waldhar out of the gaol.
- Report back to Captain Brant.
This quest is unlocked by choosing "Accept" to the dialogue option "Tell me of monster culling" when speaking to Brant at the Stardrop Inn during the quest, Seat of the Sovran. You'll also receive the Gaol Key from Brant which you'll need for this quest. Prioritize or mark the quest from the menu and look at the map to find the highlighted objective. Your destination is to head to the Vernworth Castle Gaol Tower of Vernowrth Castle, south of Vernworth. Take note that the area you are about to explore is "Restricted Entry".
Click on the images above to enlarge them.
Since you'll be entering a restricted area, you'll need to acquire a disguise such as a mask. During the quest Disa's Plot, you should have acquired the Marcher's Set. You can wear this and use it as a disguise to avoid being caught by the guards. Head to the castle's area, equip your disguise, and proceed to the gaol where you'll find the magistrate in his cell. The magistrate is locked inside the first cell on the right. Use the Gaol Key to open his cell and then speak to him where you'll learn that he will only go with you if you find an area that are full of tomes.
To find clues on where you can start looking, go back to The Stardrop Inn and speak to Brant at night, which he'll mention about heading to the slums of Vernworth. We would also like to advise you that going to this area, you need to pick up a side quest related to it which is "The Heel of History". To activate the side quest, head to the slums of Vernworth and donate food (twice) to Kendrick of Gracious Hand. He is outside The Gracious Hand building, near the ruined base of an old tower. Please visit the "The Heel of History" page to find the quest walkthrough.
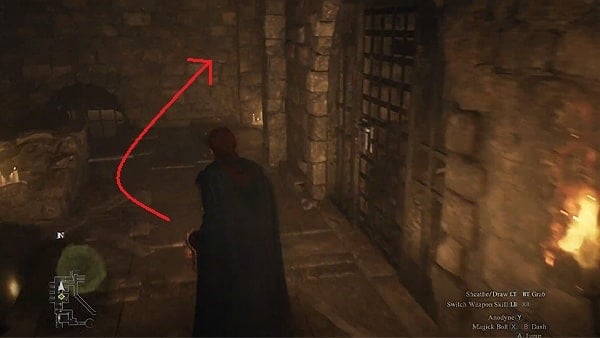
Now upon completing it, you'll find the location fit for Waldhar which is The Gracious Hand's Vault. With your disguise on, return to the gaol and tell Waldhar about your findings. He'll then ask you to accompany him outside. From Waldhar's cell, turn right and go to the end of the room to find a locked gate on the right. Use the Gaol Key and then go down the spiral stairs. When you reach the bottom, you'll find another gate leading outside. You can use the same key to unlock this. Once you've guided him outside, he'll part ways and you'll progress the quest. All that's left to complete this quest is to return to The Stardrop Inn at night and report to Brant about freeing Waldhar. Completing the quest rewards x1 Ferrystone, 7000 G, and 1200 XP.
The Nameless Village
- Make for the Nameless Village
- Speak to Srail and loot the houses
- Head to the Old Noble Manor
- Speak to Flaude
- Speak to Flaude again to get the Legend's Opus
- Loot the Old Noble Manor
- Pick up the Seeker's Token
- Check the hold on the ground outside the manor
- Go down to the Nameless Village Depths
- Speak to Srail to get Darragh's Bill of Arrest and ask questions
- Acquire the Pilferer's Handbook
- Report back to Captain Brant
This quest unlocks when you choose the dialogue option "Tell me of the false Sovran" when speaking with Captain Brant. The dialogue option became available for us as we completed the objectives of the quest, Monster Cullings. This quest is not affected by the passage of time and has multiple outcomes.
It seems that the palace ledger has led the captain to suspect the false Sovran's origins to be of a village at the eastern edge of the region, where the queen apparently sends sums of money every day to buy unique sweet crownflowers, as the practice seems to have started the very day that the false Arisen came to power. Once you agree to investigate, the quest will start and your target destination will be marked on your map.
It's going to be a bit of a long journey so make your preparations before you go. When you're ready, head to the northern exit of Vernworth. Follow the road past the Cropper's Quarter and cross the first big bridge. Your destination is the easternmost edge of the region, so either follow the roads safely to get there or pave your own path and fight through Enemies, like Cyclops, Goblins, Bandits, and Saurians.
From there, just keep following the roads heading east to the quest marker. There should also be a couple of Campsites along the way to the destination. When you reach the river with the waterfall barring your way, follow the path to the south that bends east. It should take you up and over the river through a bridge. Another Cyclops might spawn up there so be ready for a fight, but make sure to lure the Cyclops away from the bridge as your fight could very well destroy it. If you need to customize your party of Pawns, the Riftstone of the Calm should be nearby, just below you. If the bridge does break, move past the bridge and keep going south first, going down to the ground level. You'll find yourself in a narrow ravine that can take you to the other side.
Keep following the path to the east. When you find yourself entering a narrow path with large rock formations on either side, you can veer off the path and move to the right instead, as the path will ultimately lead to a dead end. Immediately as you veer off the path, you should find another Campsite to your hard right.

If you have Levitate, you can hug the outside of the rock formation to the right of the narrow path that leads to a dead end and just keep jumping and climbing as you circle around to your destination. Otherwise, just travel on the rugged path and find a way to climb up, as the objective marker comes around to your north. You should find an opening in between the rock formations which will eventually lead to the path was cut off by a dead end, which you initially avoided. Follow the path again now to shortly find yourself in the Nameless Village.
As you enter, a character named Srail will hail you and tell you that you ought to turn around if you're looking to enter the village. Regardless, you'll have to keep going with your investigation. The open shack behind him will have a chest. Follow the road into the town proper. The first house to the right will have a chest. Across it will be a Merchant and the Nameless Riftstone right beside it.

Beside the Nameless Riftstone is the Nameless Inn where you can rest if you need to. Keep following the path through the village up to the mountains while checking each house for chests. Eventually, you should find yourself in the vicinity of the Old Noble Manor. Inside, you'll find Flaude, the Thief-Maister. He'll explain that this village is where master thieves are trained. If you ask for what he knows of you, he'll say that he knows who you are and that you're allied with the captain, which it seems like the Disa already knows as well. He assures you however that he isn't allied to any side, as is his principle as a master of the shadows. If you ask about Arthur, he'll unfortunately say that he's never heard of the name. If you speak to him again, you'll get the Legend's Opus which allows you to learn one of the two strongest Skills available for the Thief Vocation. Before you leave, there's a chest in the room to the right of Flaude.

From here you note that the quest will have different outcomes depending on what you choose to do next. You can choose to believe Flaude and just explore the rest of the village and then report back to the captain. This walkthrough will guide you to getting Darragh's Bill of Arrest before reporting back. Loot the place as you want, then head outside and then walk to the edge of the hill to the northeast. Very carefully pick up the Seeker's Token on the rugged rock. Head to the opposite side of the manor to find a hole in the ground with a ladder. Climb down to enter the Nameless Village Depths. Head down the next set of ladders and continue making your way down. Be wary of the bats that you'll probably alert. From here on, you'll have to time your jumps well to jump across the gap to the other side of this area. If you have Levitate, it will help you a lot as you try to finish the whole course and progress. You can kick down the ladder after each section you finish. At the end, you'll find a door you can go through.

On the other side, you'll find Srail, apparently the real Thief-Maister, waiting for you in a completely different outfit, along with other people from the village. Talk to him and ask him about Arthur to finally get some real answers. The fake Arisen's name was apparently Darragh before they exiled him for accepting to play the false role - only because the role takes place in the limelight, instead of in the shadows where they're supposed to operate. You can keep asking about Darragh and he'll tell you that the would-be Arisen was supposed to be next in line to be their Thief Maister before he sustained an injury on the chest, which he decided he would use for his little role-play. In contempt for breaking their code, Srail gives you Darragh's Bill of Arrest, a sort of identification, to help you prove his scam. He will also give you the Pilferer's Handbook, which allows you to learn the other of the two strongest Skills available for the Thief Vocation.
Loot the room as desired and then head out the door at the east side. On the other side, you'll find a whopping six chests. Follow the path out to the village where your Pawns will be waiting for you. From here, you can make your way back to Vernworth on foot, or you can use a Ferrystone and teleport back to its Portcrystal. Back in Vernworth, make your way to the tavern and wait for nightfall to talk to Captain Brant. Ask him about the false Sovran to report back your findings. You'll have to give him the Darragh's Bill of Arrest that you got from your investigation, which you'll both agree to publicize to sow suspicion against the crown.
The Stolen Throne
- Acquire formal clothes
- Head to Vernworth Hall at night
- Loot the building
- Acquire the Exquisite Spectacles
- Look for the hidden passage
- Enter the Rose Chateau Bordelrie
- Report back to Captain Brant
This quest is unlocked by choosing "Accept" when choosing the dialogue option "Tell me of the masquerade" when speaking to Captain Brant at The Stardrop Inn at night, after completing the quest Monster Cullings. It seems like the false Arisen has recently recovered from his supposed "battle wounds," and the nobles have been holding masquerades every so often to celebrate his supposed valor. The captain suggests infiltrating this masquerade to try and get a glimpse of the pretender behind the mask, to maybe gleam any insight about him. This quest is affected by the passage of time.
For this endeavor, you'll need a masquerade mask and some formal clothes. When you accept the quest, the captain will give you the Eventide Mask to start. As for the rest of the formal wear, we got ours by finishing the Side Quest, The Ornate Box. This quest involves revisiting a boy named Sven a few times. Completing it will reward you with the Courtly Breeches and the Courtly Tunic.
Make sure you have all three equipped and then make time pass until nightfall. Your destination will be Vernworth Hall at the Noble Quarter of Vernworth. Your Pawns will not be allowed in the Noble Quarter and will have to stay by the boundary. The Vernworth Hall is located at the western edge of the Noble Quarter. If there is no masquerade being held at the time, you can just keep resting until nightfall until there is one. You can also tell if there's a lot of people coming in and out, with masquerade masks on.
You won't actually find the Sovran pretender standing or dancing around in the main room. Instead, head back toward the door and make a sharp turn into the circular hallway. Follow it to the west side of the building. There'll be two openings on the wall here. The southern one will have a chest as well as the Exquisite Spectacles on the wooden shelf, which you'll need for the Side Quest, A Magisterial Amenity. The northern one will have a chest containing Courtly Breeches and a Courtly Tunic, probably for you to sneak in and acquire if you couldn't find formal wear before.
In the middle of the two openings on the wall, you'll find a section of it that's partly pushed back. You can actually have your character go through it to reveal a hidden opening. As you enter this small room, you can find an Allheal Elixir on the desk in the corner. Head out the double doors to find yourself at the backside of the Rose Chateau Bordelrie. Follow the path north until you find an opening into the building and enter it for a scene.
Lady Wilhelmina will help you avoid the soldiers as you bear witness to the true personality of the false Sovran, as well as a glimpse into the masterminds behind the entire farce - Queen Regent Disa and Lord Phaesus, who notably was the person who seemed to recognize you at first in the dancehall. She'll help you with your escape and give you the Myrmecoleon Card afterward.
Exit the establishment and then head back to The Stardrop Inn. Report your findings back to Captain Brant. After you tell him about your experience, he'll come to the conclusion that the fake Sovran isn't privy to the Queen regent's schemes and is merely just a paid puppet. He'll tell you that he'll look into the Lord Phaesus and that completes this quest.
An Unsettling Encounter
- Wait for nightfall and then head to the Royal Quarter
- Follow Sonia
- Head to Allard's Chambers
- Look for the secret passage
- Acquire the Battahli-Crested Letter
- Find another way out
- Approach Wilhelmina
- Report back to Captain Brant
This quest is unlocked by choosing "Accept" when choosing the dialogue option "Tell me of rumors about Allard" when speaking to Captain Brant at The Stardrop Inn at night, after completing the quest Monster Cullings. It seems that your new ally, Sven, witnessed a suspicious delivery to Minister Allard who took great pains to make sure he was hidden. Allard happens to be one of the Queen regent's strongest allies in the palace's politics, so it's worth looking into. Sven will call the minister to his chambers at night, while you sneak into the minister's chambers and uncover what you can. This quest is affected by the passage of time.
For this quest, you'll want to go to Allard's Chambers in Vernworth Castle while it's nighttime, so make the necessary preparations and then head there. When you enter the Royal Quarter at night, you'll find a guard out front who the captain has ordered to help you out. She'll lead you to the back of the castle safely. From here, you can explore freely but be wary about making a ruckus. Head into the door up the stairs where Sonia stops to enter The Guardhouse, and then into the next as well. Afterward, turn immediately to your right into a large hallway. Head down south and then you should find a spiral staircase to your right, on the southwest edge of this hall. Head up the staircase to the second floor where you can follow the general area of the objective marker along the southwest corridor for a scene.

Don't rush forward quite yet, as you'll see them leave the room and pass by you. Once they've passed, enter the room to fulfill your purpose here. You won't find much inside initially, but look for a secluded section of the east wall of the room to find a hidden room near the desk. Inside, you'll find the Battahli-Crested Letter on a table.
As you try to head out of the secret room, you'll hear Sven and Allard right outside, so you'll have to find a different way out. Look to the west to find an open window and head out of it. Jump onto the covered carriages to the west to find the ground safely. Sneak past the guards and head for the exit. As you try to head out of the archway, you'll bump into Wilhelmina.

As a guard comes snooping, she'll help you hide and avoid capture. With the coast clear, you can hightail back to the captain and report back on your task. Head back to the tavern and ask Brant to tell you about Allard to effectively report back. He'll give you a short summary of Vermund's current relationship with Battahl - that is to say, there is none, apart from some blood spilled in a time past. Things are stable right now, but this new information does not bode well for this current peace. The letter speaks of securing Melve as part of an agreement, as well as some power called "godsway." The captain will endeavor to look into these things while he asks you to visit Melve
Feast of Deception
- Acquire the Steeled Virtue gift from Brant
- Dress formally and speak with Captain Brant
- Rest until nightfall and then speak to Captain Brant
This quest unlocks when you speak with Captain Brant after completing the quest, An Unsettling Encounter. This quest is affected by the passage of time, as well as the chosen outcome of a previous Side Quest, The Arisen's Shadow. It seems that you're finally gaining a lot of traction in your endeavor to expose the royal scam. Your successful tasks with the good captain have earned you an invitation to the coronation. You'll need your formal clothes for this, which you should already have as to was required to finish The Stolen Throne, or you should've at least found some during your time in the Vernworth Hall during the same Quest. However, if for whatever reason you find yourself lacking in formal raiment still, again, you can finish the quest The Ornate Box which rewards you with some.

Before anything else, however, head to your dwelling here in Vernworth and you should see a pack hanging by your door. It's a gift from the good captain, along with a note of his gratitude. After you've equipped your formal attire, and when you've thoroughly prepared, you can speak to Captain Brant to progress the quest. Note that events of this quest may change some things for you in the overworld, so you might want to do some exploring or maybe get some Side Quests done if you'd like to before you continue. When you're ready, speak to Brant and choose the option "I am ready" as you ask him about the coronation.
Time will automatically pass until the morning and you'll be treated to a bit of a cutscene. As you try to enter the palace with Brant and your Main Pawn, the latter will bid you to not enter the palace as he struggles to fight against something that's trying to control him. It seems that this "godsway" is something that our schemers have found that allows the false Sovran to overwrite your control on Pawns, which will spit in the face of any evidence you have against his legitimacy as the Arisen. Your group will wisely elect to abandon your task for now.

Your little ally, Sven, will report to Brant that the false king was wearing some kind of necklace, which you assume would be the Godsway artifact. Brant will try and get answers from the agent you apprehended during the events of The Arisen's Shadow.
NOTE: The Arisen's Shadow is a quest with multiple outcomes. If you released Bermudo, Brant will say that he'll "try to find a way forward" instead, and all related conversations will follow suit.
To continue, you'll have to let time pass for at least a day and then come back to the tavern at night as usual. Talk to the captain about the coronation. It seems he's found out that there's a place in Battahl that specializes in the strange. For this endeavor, he'll give you the Border Entry Permit that will allow you to cross to the neighboring region. If you are a Beastren, he'll give you the Beastren Border Entry Permit, remarking about how lucky it is that you are one. If you apprehended Bermuda during The Arisen's Shadow, he'll tell you that he's also found out there used to be an oracle who served Vermund previously, who prophesized of your arrival. Naturally, the Queen regent disliked it and had her banished. It seems she was the Bermuda's source of information in the first place, so it'll be a good idea to find her and befriend her.
Dragon's Dogma 2 Part 2 Walkthrough Story Quests
Click to be redirected to the specific page of the quest.
Nation of the Lambent Flame
- Head to the Checkpoint Rest Town
- Approach the gates and cross the border to Battahl
- Acquire Golden Trove Beetles
- Head to the The Rockmouse's Tavern
- Meet Menella
- Speak to Menella at the tavern
This quest unlocks automatically after completing the quest, Feast of Deception, and is not affected by the passage of time. It seems that the good Captain Brant's interrogation (or investigation, depending on your chosen outcome for The Arisen's Shadow) has proven a bit fruitful. Your only chance of learning more about the Godsway, aside from just recklessly divebombing the royal schemers, is through a place in the neighboring region of Battahl that specializes in the study of the strange. The good captain has given you a permit to cross the border, so all you have to do now is go.
To do this, head for the West Vernworth Oxcart Station. If you haven't gone to it before and you're having trouble finding it, you can find it in our Interactive Map [See Dragon's Dogma 2 Map]. Interact with the signpost if the Oxcart isn't ready yet, and then pay the fee to ride it to the Checkpoint Rest Town. As always with these Oxcart rides, make sure you're ready for any ambushes that might interrupt your trip.
When you get to Checkpoint Rest Town, follow the winding road up the settlement all the way south to the large closed gates for a little cutscene. It seems like Phaesus has coincidentally also chosen this time to go to Battahl. Your own permit will hold, thanks to the good captain, and you'll also be allowed passage through. As you cross the border, there should be a man by the stables by the name of Lyssandro. He'll have some issues concerning some bandits that have been terrorizing the Oxcarts recently. Agreeing to help him will start the Side Quest, Mercy among Thieves.
Keep following the road down to the south and you'll encounter the Pathfinder by the cliffs, or a blurry vision of them to be exact. This entity is the very same one who helps you escape the gaol at the beginning of the game. He'll comment on how you've chosen on your own to come back to where you were enslaved before, as well as give you advice to find a place called The Rockmouse's Burrow in Bakbattahl.

Keep following the road east to get on your way to our objective marker. You may encounter some , Redwolves, and Bandits as you find your way, so be prepared. There will be a few Campsites along the way as well for you to use. Don't forget to pick up any Items you see as you explore, as they will likely be new and native to Battahl. When the path forks, you can veer to the right a little bit to fight some more Hobgoblins guarding a chest.
Follow this path for a bit and head south and you should see a structure that has another chest. As we went down the short staircase south from there, we found a Golden Trove Beetle on a tree. Get back on the main path and continue following it south. You'll eventually come across a bridge, and we found yet another Golden Trove Beetle on the tree right by the waterfall. If you get in a fight here, you can destroy the rocks that are blocking the stream to finish your Enemies off with the force of the water. Across the bridge, there should be a small crevice where you can find the Riftstone of the Fanged. If you climb over this Riftstone to the easy you'll find an open area where you'll get a Culling Request to kill some Rattlers.

Nearby you can look for a narrow wooden staircase that will take you up to the Battahl Ropeway Station Two. These large devices are unique to Battahl and you can use them to travel to other stations. Hop on and then turn the crank to move across the ropes. While you're in the air, you might have to contend with fliers such as Harpies and even Griffins who can destroy the structure and cause you to fall down, so it's in your best interest to move across the ropes as fast as you can. If you're successful and lucky, you'll be able to take this route all the way to your objective marker. Otherwise, you can always just stick to the main road, as it will inevitably lead to where you need to go as well.

As you get near the establishment, you'll likely have to fight the Griffin. As you probably have fought it before, you know it's a formidable foe and it'll be especially tough in the current environment. However, you just have to survive and deal some damage to it before it runs away. Eventually, you'll be stopped by Menella, your mediator with the guards. Head inside the tavern to find Menella waiting for you, who'll explain to you the current state of affairs in Batthal. It seems the nation has been troubled with matters of discrimination against Pawns. Menella offers you the Battahl Residence Permit, which should keep you undisturbed as you carry on with your task in Batthal, in exchange for helping her and Empress Nadinia with this nation's troubles. Pledging to help her will complete the quest.
Flickering Shadows
- Approach the main hub of Bakbattahl
- Head for the Olta'Battahl Coastline
- Speak to Ambrosius
- Acquire a Small Blue Crystal Shard and give it to Ambrosius
- (Optional) Head to the Bay Wayside Shrine and ask The Dragonforged about the Godsway
- (Optional) If you can, and if you're lacking, purchase a Ferrystone from The Dragonforged
- Head to the Reverent Shrine and ask Luz the oracle about the Godsway
- Teleport/travel to Harve Village and speak to the Rivage Elder
This quest unlocks automatically after completing the quest Nation of the Lambent Flame and is not affected by the passage of time. So far, you've learned that Battahl has been troubled with matters of discrimination against Pawns. Menella offers you the Battahl Residence Permit, which should keep you undisturbed as you carry on with your task in Batthal, in exchange for pledging to help her and Empress Nadinia with their cause.
Make your way east into Bakbattahl proper. As you approach the main entryway, the mysterious Pathfinder will appear again to give you advice on where exactly to go next. Apparently, there exists a place called the Forbidden Magick Research Laboratory, and this is that place that Captain Brant had heard about that did studies on the strange, and your new/old friend has confirmed that they'll have something on the Godsway. Before heading there, you're first told to pay a visit to Ambrosius, a researcher for that laboratory.
A few steps forward and you'll find all the different amenities in Bakbattahl. There are a couple of different Side Quests that you can start, progress, and/or complete here, so explore as you'd like. To progress this quest, however, you'll ultimately want to get to Olta'Battahl Coast to find this Ambrosius fellow. To do so, you can take any of the left turns here in town up north to eventually find the Dye Stores. From there, head out to the northern exit and just follow the winding path to the northeast to find the coastline.
Head for the highlighted area on your minimap to look for Ambrosius. When you speak to him, he'll ask you to find him a Small Blue Crystal Shard. You can easily find one here along the rocks of the coast if you haven't already. You can ask him what it is after you deliver it to him and he'll tell you that it's actually what allows the Godsway to have its power that commands Pawns. However, these small fragments won't really do too much and you'll actually need much larger ones. He'll advise you to seek out either the oracle, the same oracle Brant told you about, or The Dragonforged to find out more. He'll give you 100 G for your efforts.

Of the two, the closer one to you is The Dragonforged. Note that, while one of the objective markers leads to him, speaking to him is not actually required to progress the quest forward, but will be good for you to glean a bit of knowledge and lore. The Dragonforged can be found in the Bay Wayside Shrine, which you'll get to if you take the path to the left instead when the path splits inside the cavern just north of the coast. When you talk to him, you can ask him about the Godsway to which he'll say he knows nothing. However, he will reveal that a Batthali sorcerer named Phaesus came to him and asked him about dragons, with the purpose of wanting to "alter the will of the world." If you have the WLC for it, and you don't need to use it for anything else, make sure you have at least one expendable Ferrystone for later on.
To actually progress your quest, you'll need to find the oracle next. The fastest way to get there is to travel back to the Checkpoint Rest Town via Oxcart. The Bakbattahl Oxcart Station can be found near the town's middle intersection. As usual, interact with the signpost if the driver isn't ready for passengers. When they are, pay the fee and then hop on for the ride. You can doze off to speed up the travel. If your trip gets disturbed by an ambush, you can check your map if you got ambushed near the objective marker so you can just get off the ride there and travel by foot. Make sure to rest at a Campsite if night travel is proving a bit too difficult.
Whether you come from the Checkpoint Rest Town or not, you want to look for the path that directly leads to your quest marker, which would be a bit past the Enoa'Battahl Forest from the town. Make the turn there from the main path and you'll want to keep going past the Forgotten Ruins. Of course, you're free to explore if you want - many chests are scattered around the ruins. Head up the hill to your objective marker, all the way to the Reverent Shrine. Head up the stairs to find a smokey visage of the oracle Luz. If you speak to her and ask her how she knows that you're the Arisen, she'll reveal that she is able to see and feel your distinctive warmth. When you ask her about the Godsway, she'll say that she doesn't know much about the artifact itself. However, she can feel the existence of a land, submerged in the sea, that is bathed in the same distinctive warmth of power that you are. She'll also mention that you'll find a way to it in time, and advise you to look for a a person who is "dragon-forged" in Harve Village. Speaking to her also unlocks the Trickster Vocation for you.
Time to go back to Harve Village this time. You've already been there before, during the events of Monster Cullings. If you've activated the Portcrystal there, and you have that Ferrystone in hand, you can just teleport there quickly. If you neglected to activate the village's Portcrystal, you'll have to backtrack and make your way there on foot. Start by going back to Vernworth and heading west.

Head for the southwestern edge of the village to find the Rivage Elder's Home. If you teleported to the Portcrystal, you'll be right there. Speak to the Rivage Elder. If it's too late in the day, he'll say he'll need to rest first so time will automatically pass to the next morning. When you awake, he'll tell you about the temple that has sunk in the middle of the sea, as well as its ruler who was supposed to watch over the world from the skies but grew tired from his duty and brought his kingdom down to the earth. He was such a great ruler that his servants protect him even in death. As the Rivage Elder finishes his story, a structure will rise from the seabed and you'll be notified of a disturbance in the Stormwind Cave. A guard will see the sight and mention having to alert his commander of this development.
Convergence
- Enter the Stormwind Cave
- Make your way to the Seafloor Shrine
- Approach and speak to Rothais
- Acquire the Dulled Godsbane Blade
This quest unlocks automatically after completing the quest Flickering Shadows and is not affected by the passage of time. As you hear the tale of a bygone rule from the Rivage Elder, an awesome spectacle happens before your very eyes. With the emergence of the structure from the seabed, you and your Pawns also noticed a change happening in the Stormwind Cave. You'll have to make your way there and see how it's connected to the structure.
Good thing you're alright right at the cave's entrance. Turn around and head for the caverns where the guard came from, but make an immediate right when you see an opening on the ground. Carefully make your way all the way down to enter the Stormwind Cave. As you venture through this place you'll be fighting some Saurians, so be prepared for them. Either of the paths you can take for now converges so just follow one of them south. When they do converge, continue down south. You'll shortly get to the area where the structure that rose from the seabed connected itself.

Keep going south until the end to enter the Seafloor Shrine. Follow the path down the stairs to your right and you'll find a room with nothing much in it. Loot the gathering points as you'd like, and then through the opening to the south. Before the next opening, there's a chest to your left that you can loot. As you enter the large chamber, hop down the ledge for a cutscene.

It seems that the founder of Vermund was a Beastren by the name of Rothais, and you get to have an audience with him down here. He'll be wary of you and prepared to fight another agent of somebody called the "watching one," but will quickly realize you're not there for a fight and recognize you as an Arisen.
From there you can say that you're there to learn how the Godsway works, or that you're there to get an artifact for yourself. Choosing the former, you'll learn that the fragments that are used for the Godsway are actually soul fragments of other Arisen who have been brought there to try and kill Rothais, but have died instead. Sensing your strong will, he'll offer you his own withered blade, forged with his own soul, that must be strengthened by the Battahli's magicks to have its potential unlocked.
A New Godsway
- Deliver the godsbane to Ambrosius.
- Obtain fifteen wyrmslife crystals.
- Head to the Reverent Shrine and speak with the Oracle.
- Head back and prepare at Bakbattahl.
- Head west towards Dragonsbreath Tower.
- Defeat the Ogre.
- Defeat the Lesser Drake.
- Bring the Wyrmslife Crystals to Ambrosius.
- Wait a day
- Claim the Blade from Ambrosius.
Right after you retrieve the dulled Godsbane blade that Rothais left in your care after the Convergence quest, you'll need to bring the blade to Ambrosius in the Forbidden Magick Research Lab in Bakbattahl. From the Seafloor Shrine - Sacred Grounds area, head Southwest until you reach Bakbattahl. From here, head to the eastern side by following the quest marker and you'll find yourself crossing a small bridge leading to a door which is the Forbidden Magick Research Lab. Head down the stairs and turn left through the doors and you'll see Ambrosius. Speak with Ambrosius and select the Dulled Godstone Blade, and give it to him. Amboricus will be surprised and will ask you how you obtained such an item but will shrug off the question. He'll proceed to mention that with this item alone, he will be able to craft the finest superior godsway. Afterward, he's going to need some wyrmslife crystals and you can agree to get it for him. Ambrosius will laugh and question you if you know what you're talking about. He'll tell you that these crystals can only be obtained from Drakes. He'll then send you off and you'll need to obtain 15 wyrmslife crystals.
.jpg)
To get to the 15 Wyrmslife Cyrstals, head northwest of Bakbattahl to the Reverent Shrine to consult the oracle. For a faster travel time, you have the option to use an Oxcart. Upon arriving, speak with the oracle and choose "Where is the dragon I seek?" after you reach Reverrent Shrine. She'll direct you to the Dragonsbreath Tower which is southwest in Battahl. Make sure to head back to Bakbattahl and retrieve the necessary healing items and get a camping kit. If by any chance, you've already encountered Drakes before, there's a possibility that you have already collected the necessary number of Wyrmslife Crystals needed for this quest, if that's the case, you can skip the hard parts already.
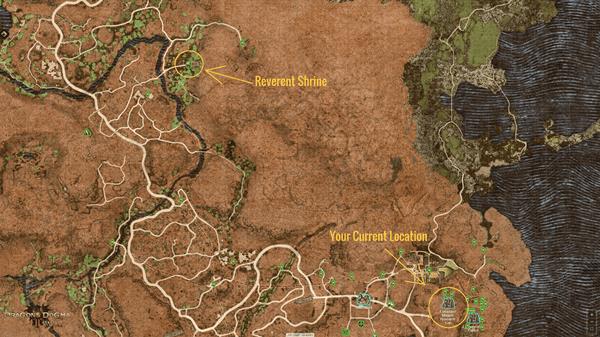
Once you've rested and restocked in supplies, head west from Bakbattahl until you reach a fork in the road and turn right. Continue on this path going to the Dragonsbreath Tower. While traveling, make sure to check your map from time to time until you reach the border between Bakbattahl and Wyrmsblood Forest. You'll notice that a road going North into Wyrmblood Forest already leads to the tower. As you cross the bridge and enter the forest, an NPC named Marthe will try to prevent you from entering because of the dangers inside the forest. You'll need to prepare yourself for Harpies, Goblins, and other Battahl enemies. As you get near the tower going up, your character will encounter an Ogre which will commence a boss fight. After defeating the ogre, make sure to heal up and rest before proceeding again up the tower. You'll also need to deal with some Harpies that will ambush you after you defeat the Ogre.
Now, continue on the path until you see another bridge that you can cross. This bridge will lead to a Riftstone where you can make final preparations for yourself in terms of choosing better pawns that will aid you in the Boss fight with the Lesser drake. Afterward, proceed further through the path until you reach a flight of stairs that has a campsite near it. Once you're all set, head up the stairs and you'll meet Sigurd, who is the Mystic Spearhead vocation master who will volunteer to battle the Lesser Dragon with your team. Now, head up the stairs and proceed to the Boss area where you'll find the Lesser-Drake in combat with some Harpies. Once you defeat the Drake, you'll now receive the Wyrmslife Crystals. Now, when you're ready to embark back to the Forbidden Magick Research Lab to give Ambrosius the 15 Wyrmslife Crystals, head East back to Bakbattahl. Once you get back, Ambrosius will be surprised that you managed to retrieve the needed crystals. He'll then ask you to return the next day since he needs a day to finish the blade. After a day, going back to his office will cause a brief cutscene to play out. In this scene, Ambrosius makes an attempt to keep the godsway for himself, but the Pathfinder prevents him from proceeding and brain wahses him. The godsway is handed over to you by Ambrosius, who then requests that you deliver it to Phaseus on his behalf. This brings the quest to an end, which will reward you with 35,000 money, 6000 experience points, a Wakestone, and the Empowered Godsbane Blade.
The Guardian Gigantus
- Take the Godsbane to Phaesus
- Open the Flamebbearer Palace Spellseal Door.
- Stop Talos from reaching Moonglint Tower.
- Target the weak spots around the body of Talos.
- Defeat Talos.
After collecting the Empowered Godsbane Blade from Ambrosius, leave the Forbidden Magick Research Lab for Phaesus. After leaving the lab, a cutscene shows Phaesus and his troops opening and passing through the Flamebbearer Palace Spellseal Door. Go south of Bakbattahl and use the Empowered Godsbane Blade to open those doors. At the Flamebbearer Palace Spellseal Door, press investigate and your character will raise the sword to unlock the doors. When you reach the cliff, a cutscene will show the Guardian Gigantus Talos emerging from the ocean and approaching Volcanic Island. After some time, you can roam freely and witness the Guardian Gigantus approaching the island. You must traverse the road again before the monster reaches the Moonglint Tower and slow Talos. Continue following the quest marker to catch the Guardian Gigantus. A cinematic shows the Guardian Gigantus glaring at Phaesus and his troops when the island with water is reached. Gigantus is slowly approaching Moonglint Tower; you must stop him.
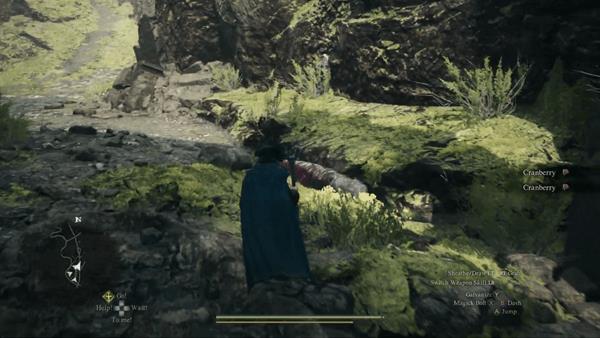
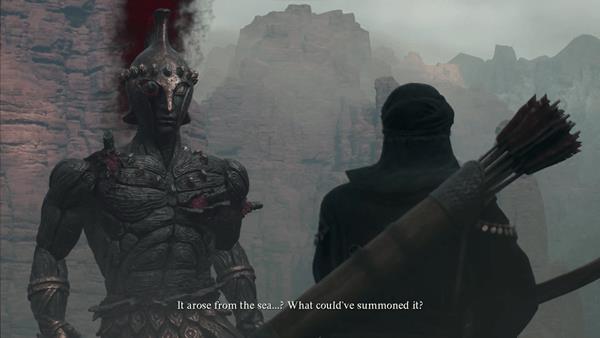
Lucky for you, he moves slowly. You must attack Gigantus' flashing spikes, his weak places, around his torso to slow him down. Striking with a melee class will drop the spikes and bleed. If you have ranged attacks, you can strike Gigantus from the ocean, but if he lands, use the terrain. Use the high routes to jump on Gigantus and reach the weak points. Use the large artillery bows employed by Soldiers defending Moonglint Tower. Take advantage of climbing different body parts and leave pawns on the ground so they can catch you if you fall. To halt Gigantus as he approaches the tower, Soldier NPCs will steadily grow in number, stun him with fire, and give you time to target his final weak areas. If you eliminate all the weak points, you can assault Gigantus until he dies before reaching Moonglint Tower. If you fail to fight Gigantus, the NPC Soldiers who are also trying to stop him will defeat him before he reaches the tower base. You will receive 19,000 XP if you fight Gigantus, but letting the NPCs handle it will not reward you.

After finishing, visit the Moonglint Tower Entrance for a cutscene. Note that you can go to Moonglint Tower and finish this quest even if you don't fight Gigantus.
Legacy
- Make preparations
- Proceed to the Moonglint Tower
- Fight the False Sovran and his men
- Make a choice
Ending 1 (Bad) Objectives
- Turn around and walk away
- Select yes
Ending 2 Objectives
- Hit the Dragon once
- Wait until you reach the Volcano area
- Defeat the Dragon
Revealing the Truth: Dragon's Dogma 2 Objectives
- Hit the Dragon once
- Select the Empowered Godsbane Blade and kill yourself
- Watch the cutscene and the revelations
This quest only triggers when you reach the top of the Moonglint Tower. After defeating Talos earlier, make your way to the entrance going to the Moonglint Tower and let the cutscene play out. This will show Phaesus in the Excavation Site where the game began asking the false Sovran if he is prepared. The False Sovran will then worry if he is going to be charred, and Phaesus will assure him that he is not in danger. They will then continue walking toward the tower and Phaesus will say that the dragon shall be under this control when it appears. This will be the end of the cutscene and you will be able to play your character again. Before you proceed to the Moonglint Tower, you can make some preparations and stock up on items and supplies at the Excavation Site Camp.
Once your done resting up and making preparations, proceed to the Excavation Camp where the game first began and make your way through until you reach the Moonglint Tower. While make your way, a cutscene will play out showing the men of Phaesus going up the stairs and entering an area, once they reach the top, the wooden stairs collapse, indicating that you cannot proceed through there. You'll now need to grow down the path in front and use the elevator. Once you reach the top, go through the scaffolding and make your way up again. Once up, cross the bridge up front and cross it. Do take note that if you managed to complete Raghnall's Side Quests, he'll be waiting at this bridge to duel you, which will trigger the Clash and Conclusion side quest.
After crossing the bridge, go through the gate and head upstairs. There's an Allheal Elixir on top inside a chest, so make sure to take it if you have taken any damage. Once you reach the top of the tower, a cutscene will play out showing Phaesus summoning the dragon that he wishes to command. He then asks the False Sovran to hold us back and not disturb the ritual.
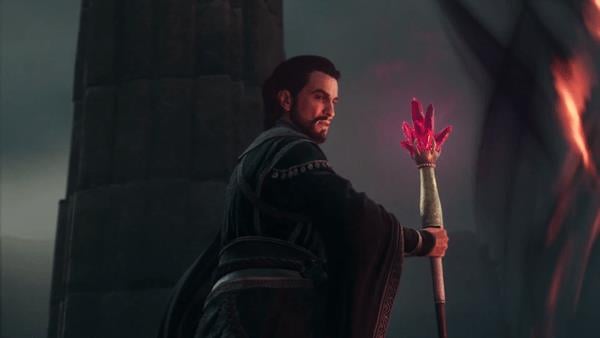
After the cutscene, you'll be able to control your character again and now you need to fight the guards and the Sovran. The False Sovran and the guards which consist of mages and archers are powerful. You'll need to deal with the mages first if you don't want to be stun locked. Don't fear, because you do not need to finish this battle, if you manage to survive for at least 2 minutes, a cutscene will play out showing Phaesus completing the ritual and summoning the Lesser Dragon. After a few moments, the true Dragon emerges as well and kills the Lesser Dragon that Phaesus has summoned, ruining the plans to break the cycle of the Arisen.
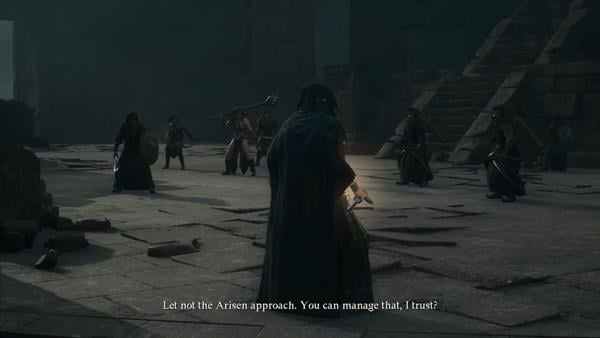
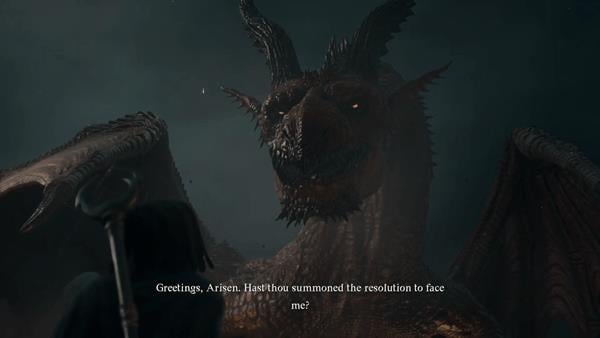
Afterward, Phaesus will be knocked unconscious and the Dragon will leave you with 2 choices for different endings. Your first choice would be to walk away and sacrifice the life of the NPC that you have the highest friendship with, and the second one is to stand up to the dragon and fight it.
Ending 1 (Bad Outcome)
To get this ending, you'll need to turn back and walk away. The Dragon will ask you if you're sure about this and you can still decide if you want to proceed with this decision or not. Choose yes and the screen will turn black. A cutscene will play out in Vernworth Castle showing your Arisen being crowned in an empty coronation ceremony, then eventually going back to the title screen where you can reload your save or start New Game Plus.
Ending 2 (Normal/Fake Outcome)
Approach the dragon and proceed to attack it to trigger the final battle. The Dragon will first lift you and carry you towards the final battle area. You'll need to listen to the full speech of the dragon until it lands in the area. You'll arrive inside a volcano where you need to fight one last time. Don't worry if your health was drained by the Sovran earlier, the Dragon will fully heal you before the fight commences. The Fight with the Dragon is quite similar to your battle with the Lesser Drake, which consists of regular attacks like the fire breath, sweeping attacks, and diving attacks when the dragon is in the air. The only difference it has, is its ability to cast spells by casting it with its palms. You can avoid the spells by just moving out of the way of the marked spots on the ground.
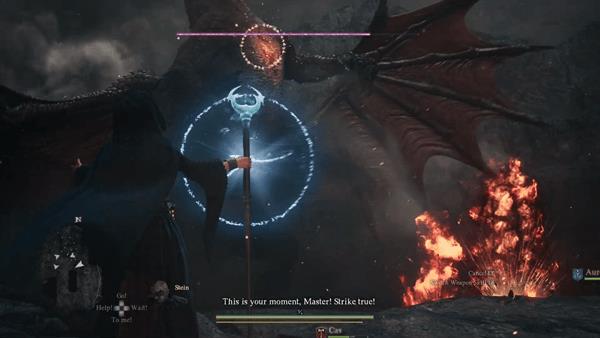
The weakness of the Dragon is its head, so attack it regularly as much as you can. What's important to remember is to always get onto his back by climbing from its legs. Doing this will always give you the opportunity to make your way to its head and deal some damage. This will also let you attack it even though it is in the air. If you manage to deal a ton of damage to its head, you'll be able to stun it and make it vulnerable for a while. When the Dragon is in this state, go to its underside and attack its heart.
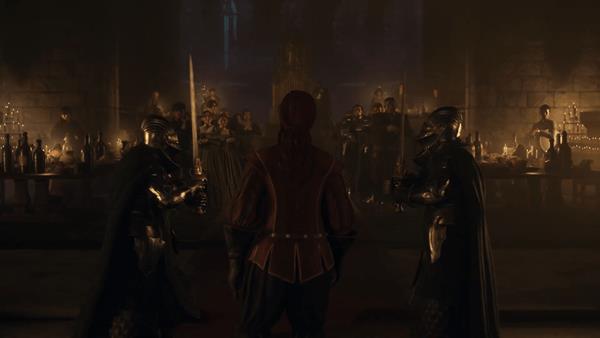
Once you defeat the dragon, a cutscene will play out showing the dragon telling the Arisen that he has already been slain. After a few moments, the Dragon will turn into ashes and the cutscene will now go to Vernworth, where a Coronation Ceremony is being held but this time, there are tons of people cheering for you including Grant. After the cutscene, you'll be able to roam the hall. From here, you can actually make another choice. You can go straight to the throne forget the good ending and enter New Game+, or speak to the Pathfinder on the table and he will offer you a chance to make a different choice.
Revealing the truth: Dragon's Dogma 2
Approach the dragon and proceed to attack it to trigger the final battle. The Dragon will first lift you and carry you towards the final battle area. While on his back, open your inventory and select the Empowered Godsbane Blade. This will initiate your character to kill him/herself and revealing the true ending. A cutscene will play out showing the dragon's heart cracking after you stabbed yourself. The dragon eventually falls into the ocean including you. The Pathfinder speaks with you and lets you know that you have strayed. He is enraged because you disrupted the cycle of the Arisen. He will reveal that you have a world that you belong to and there, you are to fell the great evil in your path and rule the people as their Sovran. The Pathfinder wishes that you live that life of purpose and tells you that it is time for you to return to that life. The cutscene ends and you wake up in the apocalyptic alternate version of the world you were exploring before. The surrounding areas are filled with red aura and the enemies here are more powerful than ever. There will be new areas to explore and new quests will unlock. "The Dragon's Dogma II" title screen also appears but the difference is, that it reveals the "II" in the end while the normal title screen usually just says "Dragon's Dogma".

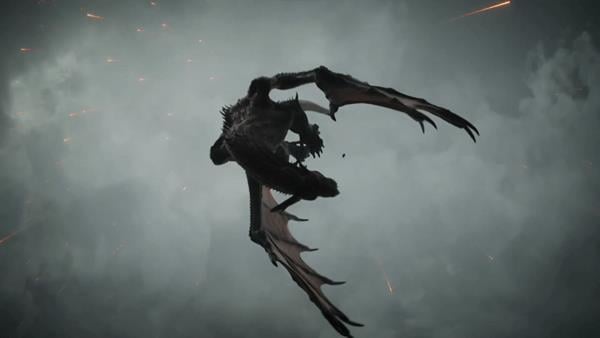
Dragon's Dogma 2 Part 3 Walkthrough Story Quests
Click to be redirected to the specific page of the quest.
Dreams Apart
- Find your Pawn
- Travel to the Forbidden Magick Research Lab
- Speak with Phaseus
- Reunite with your pawn
Once you regain control of your character, check your map and you'll find yourself near the Dragonforged's Bay wayside Shrine which is North of Bakbattahl. If you also check your map, you'll notice that the whole world has been drained of all the water it once had, which opens up new areas for you to explore.
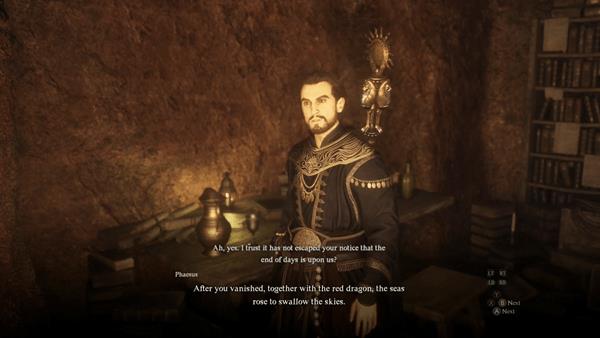
Afterward, head south towards the Forbidden Magick Research Lab located inside Bakbattahl. Once you get to the Research Lab, head up to Phaseus's room which is just above the office of Ambrosius. Phaseus will not be surprised that you are alive since your pawn is still alive as well. Phaseus will ask you if there's anything that you want to know about what's currently happening. You can exhaust all the dialogue options that are given to you. Select the first option first and Phaseus will say that you haven't noticed that the end of days is reaching all of you. Phaseus will continue to say that during your absence along with the red dragon, the seas rose and swallowed the whole sky. He'll also mention that dragons have also appeared to wreak havoc on land. Melve Village has also fallen to the new beasts that have appeared, and it will be a matter of time before the rest of the kingdom falls as well.
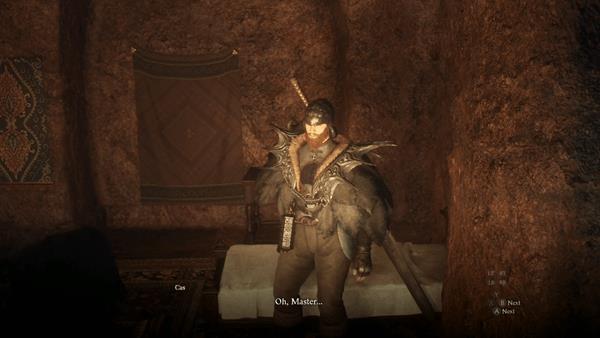
Next, select the second option and Phaseus will mention that he found your pawn collapsed by the wayside near Battahl. He recognized that it was your pawn and Phaseus decided to take it in to also know what was causing all of the madness. Your pawn also hasn't woken up since your disappearance and maybe you could change that since the pawn is yours to command. Phaseus will then ask what happened to you the past months and after some time of catching up, Phaseus will let you rejoin with your pawn, marking the end of this quest.
A Scholarly Pursuit
- Head to the red beam of light.
- Pursue the skyfallen dragon.
- Follow and defend Phaseus.
- Destroy the dragon statue.
In Bakbattahl, once you reunite with your pawn, head directly to where the shining beam of red light in the middle of the town is pointing. Once you get to the beam of light outside the door of the palace, use your Godsway sword to activate it. This will summon a small dragon relic. Phaseus will eventually appear, wanting to examine it, but a wall of magic along with ethereal enemies will protect it. After defeating the monsters, follow Phaesus across the city and rocky spires looming over the city and protect him from enemies that will appear. He'll then go back down and go to the dye fields.
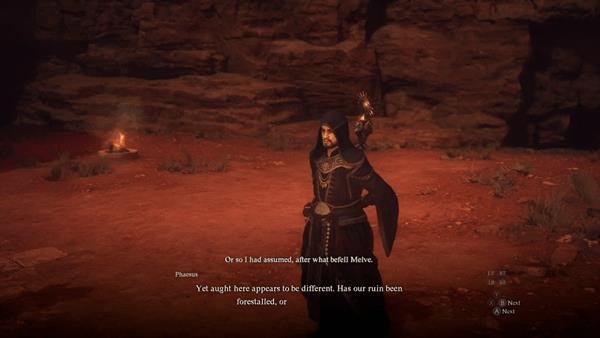
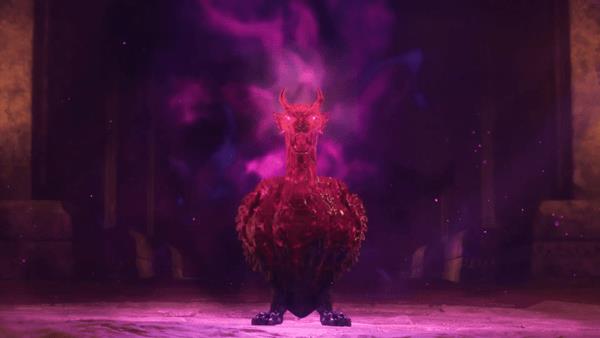
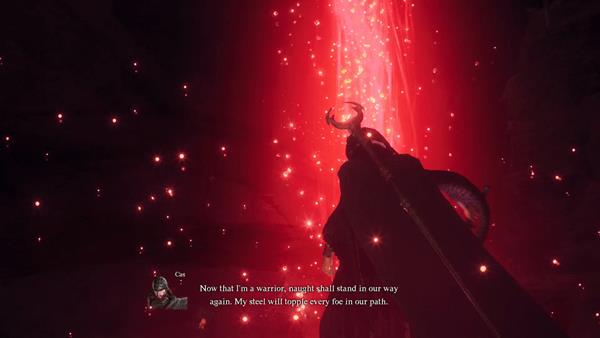
Boulders will start to fall from the sky as you move across the fields, so you'll need to dodge everytime an indicator appears on the ground. Phaseus will then reach the Forbidden Magick Research Lab and then into the palace. Exit the front door and you'll find the Dragon Relic. Keep protecting Phaseus from the spawning enemies and once you reach the last area or hallway, a big number of enemies will appear like Goblins and Harpies. When you defeat the enemies or reach the dragon statue, destroy the statue and end the nightmare happening in the city of Bakbattahl. A short conversation with Phaseus will occur and this will mark the end of this quest.
From the earlier quest, we find out that the world is already rained of its water completely. This opens up a new area that can be explored called the Seafloor Shrine. From the research lab, head North until you reach the Seafloor Shrine. Once you get to the area, you'll need to battle multiple zombies and skeletons since they are surrounding the castle at Seafloor Shrine. Normally, these enemies are only active at night, but in this world, Night and day do not matter for them. Make sure to collect multiple chests that are scattered within the area. These chests would contain Ferrystone and other important items.
After battling your way through inside the castle, head to the center yard and speak with Rothais. Rothais will explain everything that is currently happening with the world and him and once he finishes talking with you, he will summon the former Arisen so that you all can meet in the castle. Luz will appear and tell you to save the people of this world and to lead them here in the Seafloor Shrine. She explains that this place has a chance to withstand the destruction that awaits the world.
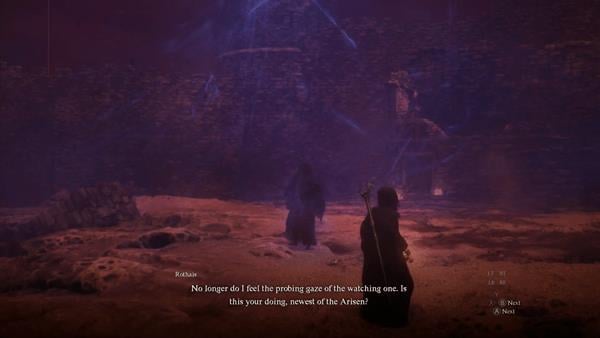
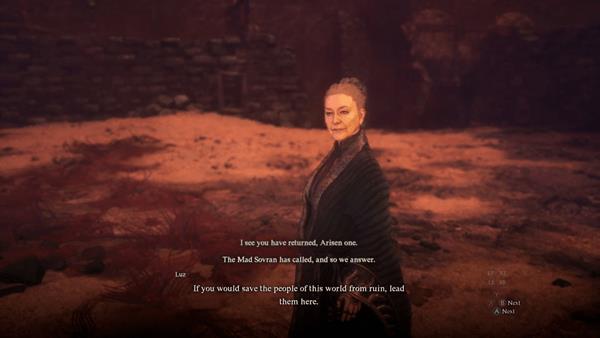
You'll now have the option to visit all of the cities and speak with their leaders regarding the evacuation effort. You may start with the settlements on the outer parts of Vermund and Battahl, and use your Ferrystones. The fog is already starting to cover most of the outer parts of the map, so don't waste time!
Evacuating Bakbbattahl
Speak with Nadinia in Bakbattahl about the evacuation effort, and she will assign you to speak with Ser Menella regarding this. Speaking with Ser Menella will be indispensable if you were to undertake the evacuation of Bakbattahl and the Checkpoint Rest Town.
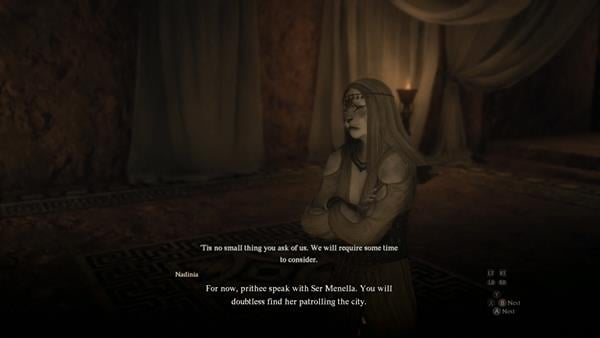
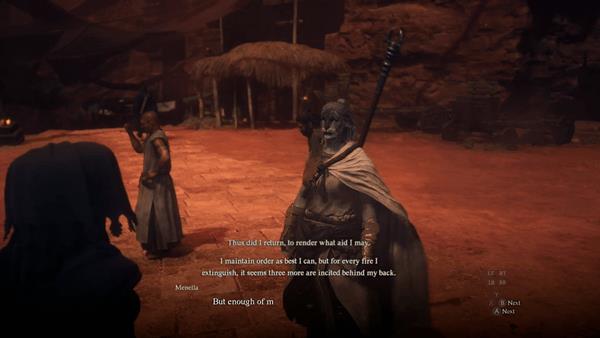
Exit the palace, and you'll find Menella intervening in a fight between two citizens. Speak with Menella and she will say that it's something to think about since if they continue to wait, they might end up the same with Melve. She only fears that since the people of Battahl are divided and ununited yet, the efforts might be in vain. A quest will unlock called Civil Unrest, and you'll need to aid in the evacuation of Battahl and settle any quarrels that are happening between the people. Once you complete this quest, the city of Bakbattahl and Checkpoint Rest Town will be evacuated.
Evacuating Vernworth
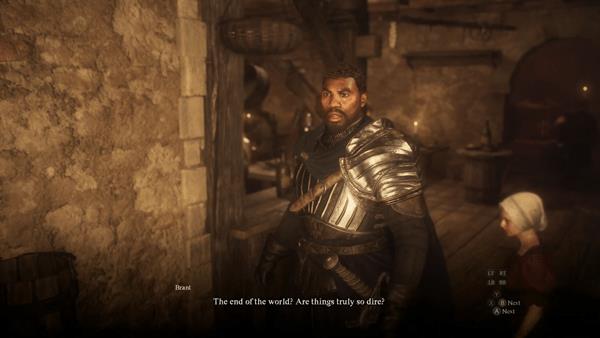
Speak with Brant at the Stardrop Inn about the evacuation effort. Brant will agree that it's for the best and that the people of Vernworth are also afraid since the news of what happened to Melve has already Spread. But, he doubts that he can convince the people of the city to abandon their homes. He'll suggest that we speak with the Regentkin since he has taken over since the disappearance of the Sovran. This will trigger the quest The Regentkin's Resolve. Once you complete this quest, the evacuation of Vernworth will begin.
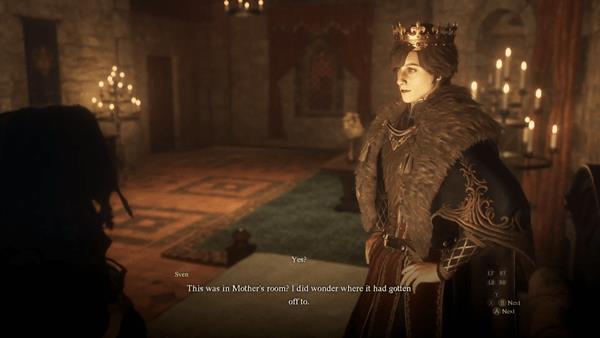
Evacuating Sacred Harbor
Head to Sacred Arbor which is located west of Melve and head straight for the red beam of light. A Drake will appear and you need to defeat it. Afterward, you have to exhaust all of your dialogue options when talking to Taliesin in the Sacred Arbor until he agrees to evacuate his people. Do take note that you need to have a pawn who can translate Elvish Language to talk to him smoothly.
Wait a few in-game days
After you've evacuated the towns and cities, this quest will be completed after you have slept for several in-game days at the Seafloor Shrine. A beam of light will appear at the shrine which will indicate the completion of this mission.
When Wills Collide
- Follow Phaesus
It is necessary to perform the necessary quests in order to finish Halls of the First Dawn in order to unlock and obtain this quest. After that, you will need to head to the outside of Moonglint Tower, which is the location where you most recently fought the Guardian Gigantus, in order to activate Where Wills Collide. Upon activation of the mission, you will see a scene in which you place your pawn within the head of Talos, the fallen Guardian Gigantus. Talos rises to his feet and begins to move through the crowd. A red serpent-like creature that will engage in combat with Talos will be spawned as a result of this action, which causes the skyu to emit a crimson ray of light. Your mission is to follow Phaesus toward the direction of the two enemies who are fighting. After a certain amount of time has passed, a cutscene will play out, which will show the serpent Creature weaving its way around Talos's head. After that, Talos seizes the creature's head and forcefully squeezes it out of existence. In addition, the serpent causes Talos's head to be squished to death, causing both of them to collapse to the ground. This will result in the pawn that is contained within Talos falling out of its head.
Ending Outcome: Trials
To reach this point and get the true ending, you first have to get to the Unmoored world by stabbing yourself with the Godsbane blade at the Legacy quest during the part in which you are traveling on the back of the Dragon on the way to the supposed final battle area. Once you've done these steps, complete the Dreams Apart quest by going to Bakbattahl and recovering your Main Pawn in the Magick Research Lab accompanied by Phaesus.
Afterward, you'll need to complete a set of trials around the map. Make your way to the red mark on the map which is in Vernworth, and complete the trial by defeating the strongest boss here. Upon defeating the boss, Vernworth is already safe and you can now proceed to the next trial in Sacred Harbor where you need to do the same thing by defeating another boss. This Boss is a worm and is the easiest boss to deal with in the game, attack the weak points that are shown and fight your way from its tail to the head.
The next trial will have you going to the location where you defeated the Gigantus. This trial is the mentioned walkthrough above and is taken place during the quest "When Wills Collide". It's a pretty easy trial since you only have to interact with the fallen Gigantus and watch the rest play out. After the quest and trial are completed, head to Bakbattahl and approach the red marker and slay the dragon that awaits you there. Take note that interacting with the red beacon will end the game. Once you've done it, a cutscene will play out and you'll get an achievement that says that you've completed the trials.
Ending Outcome: Evacuation
After you've completed the trials above, head to Rothias in Seafloor Shrine from within the Blue beacon and not the red beacon, because the red beacon will end that game. After speaking with him, Luz will appear and ask you to evacuate the people from the regions. This will indicate that you'll have to travel to Vernworth, Sacred Arbor, and Bakbattahl to speak with the leaders regarding the evacuation. This will trigger the quest "Halls of the First Dawn" and some other side quests that I will mention below.
Traveling to Vernworth will require you to speak with Brant in The Stardrop Inn and will initiate the quest "The Regentkin's Resolve" which is a must to complete to progress the evacuation of the people of Vernworth.
Your next stop is at Sacred Arbor which is a city Northwest of Vernworth. here, you'll need to have a pawn with a Woodland Wordsmith specialization to understand the elves. Speak with Glyndwr and follow him to Taliesin, who is the leader of elves. You'll have to talk to the leader 3 times and sleep 3 times until the leader gives in to the evacuation.
Afterward, head to Bakbattahl next and speak with Nadinia regarding the evacuation. She will have you speak with Menella which will trigger the quest "Civil Unrest", which is another quest that is a must to complete in order to complete the evacuation.
Next, head to the Volcanic Island Camp and speak with Ernest and complete The Importance of Aiding Ernesto quest which will have you evacuating the Volcanic Island Camp. Also, head to the Excavation Site near the camp and start the "Shepherd of the Pawns" quest. Completing this quest will have you evacuating the Excavation Site.
Ending Outcome: The Red Beacon
Once everything mentioned has been done, make your way to the red beacon at Seafloor Shrine and start interacting with it. This will initiate the end of the game and you'll be able to walk around a dragon's back during the credits. Moments later, the dragon will attempt to spit out fire on itself in attempts to get you. You'll need to stand on the edges of the wings to avoid the fire. This is where you'll get the real ending where the cycle ends.

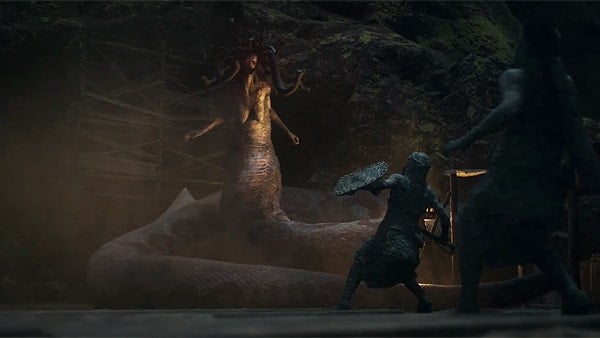
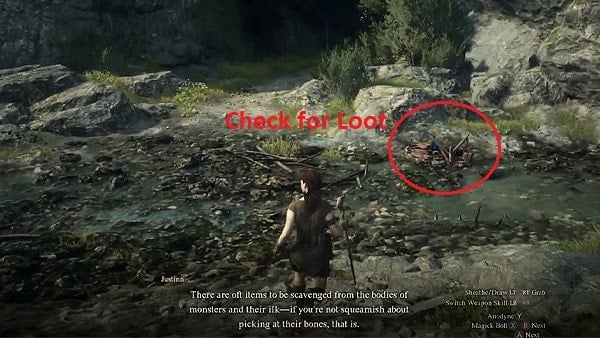
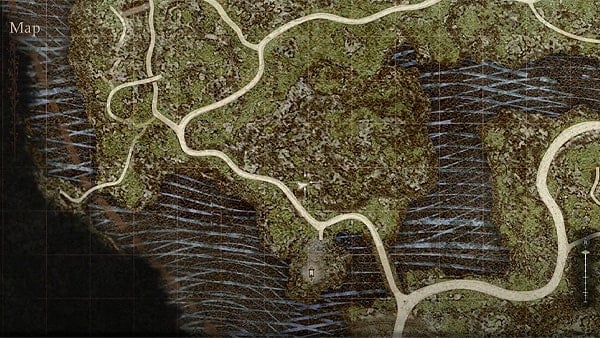
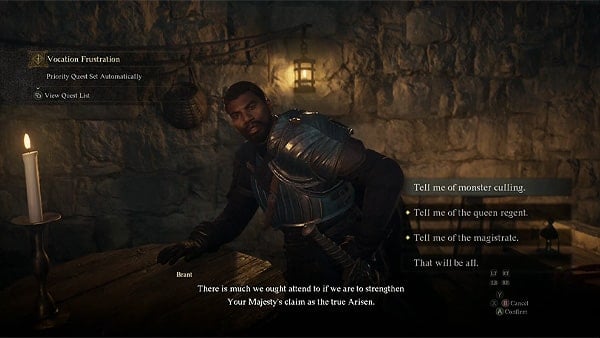
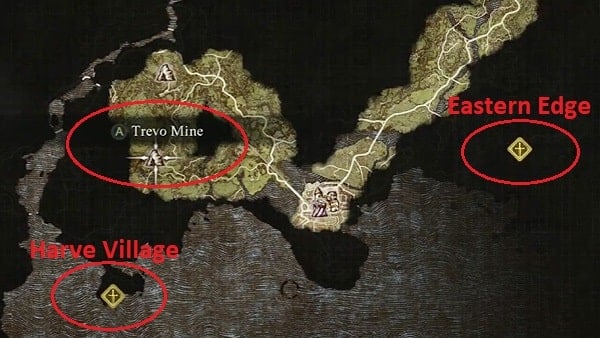
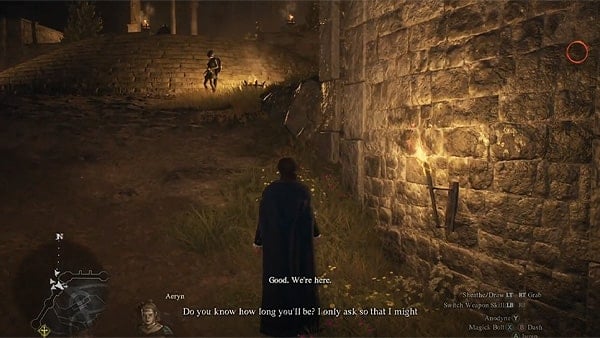
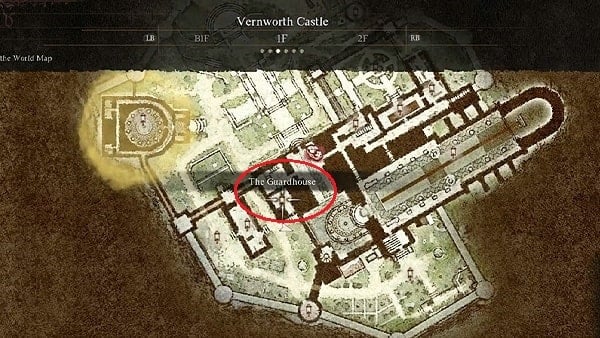
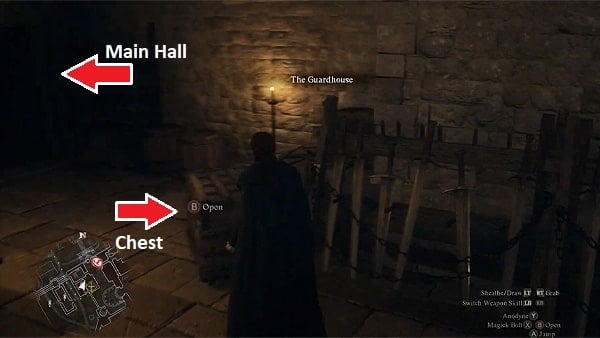
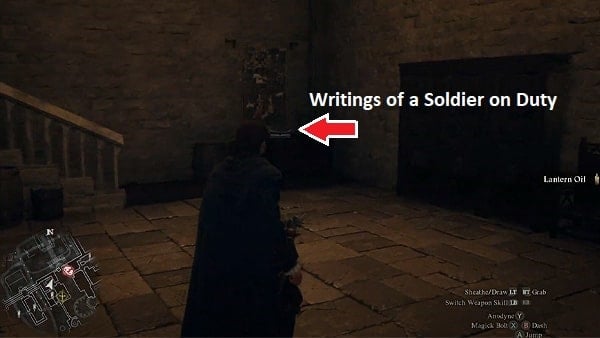
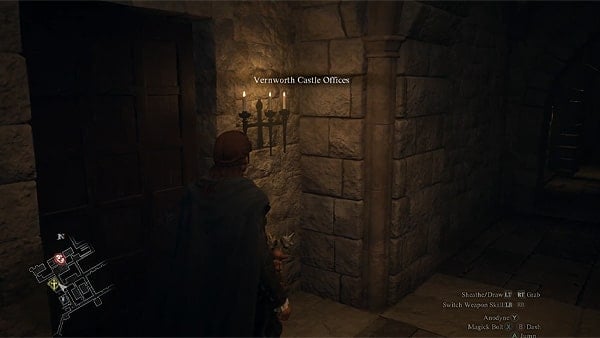
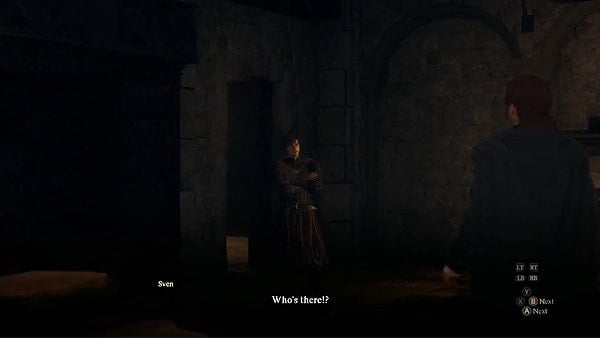
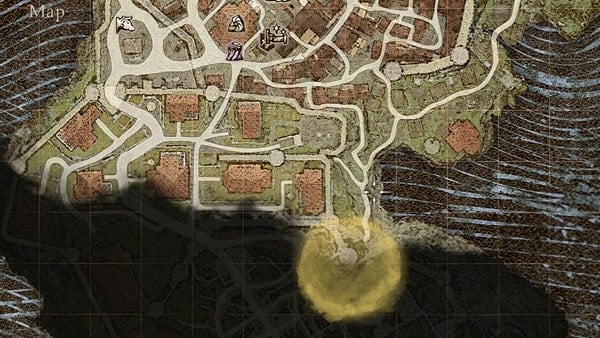
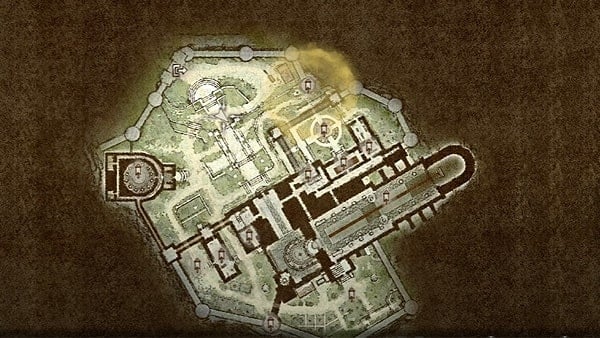


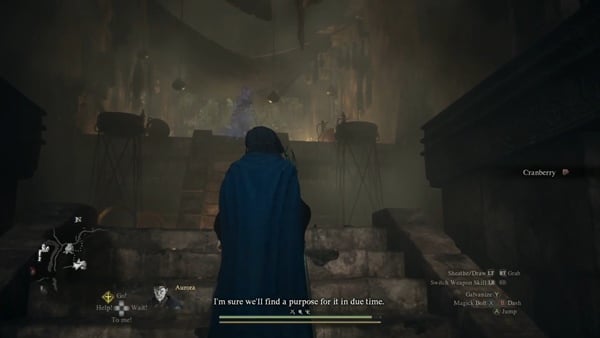


You can also evacuate the Volcanic Island camp and the Excavation Site, which have their own side quests. "Halls of the first dawn" will automatically complete once you evacuate all sites, no need to wait a few days.
0
+10
-1